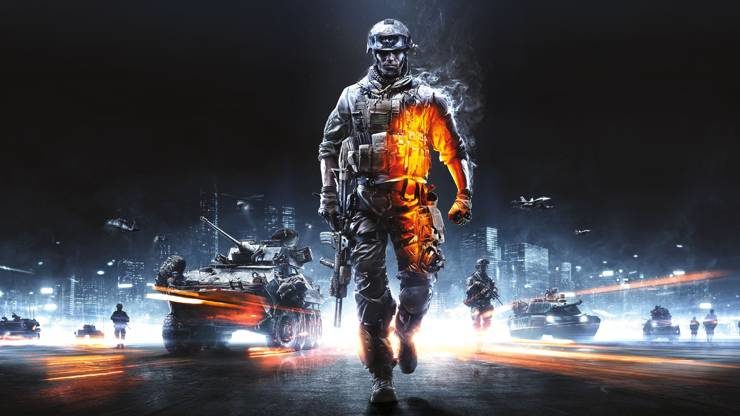
Here I am posting the complete step by step strategy guide for the single player campaign of Battlefield 3. If you completed this, am sure you will not require any guide for the hard mode, as you will have no secrets. These real perpetrators have even hard-pressed the vice to teach you how to get all the achievements / trophies solo those who are even harder such as euthanasia, Knight of the sky, in a bad or terrible the KO!
Chapter 1: Semper Fidelis:
After landing in the well-built tube, make rush to remove the first two terrorists in front of you then move forward. Take benefit of the fact that you get the blank against the next opponent to surprise him with a head-shot. Two other enemies will appear at the bottom of the tube. You must pick up the shotgun M1014 blocking the door. Go ahead. A terrorist will attack you in the right for a cut-scene. Just press the button to pass the requested event. Get down to the hall, out of the first compartment by jumping from the left window. It must also meet the jump button to reach the roof of the subway. Move remaining crouched and killing 2 enemies on the left. Jump into the hole and then quickly Take out your weapon to line up the welcoming group of 4 enemies.
Go straight but be aware because there will be many enemies trying to block the road. It should be faster than them not to attack full pear because of the few items behind which to take cover. In the hallway filled with bombs, ignore that and ahead straight ahead to complete the prologue of Battlefield 3.
Here you should connect Cole to get the strategy to be observed. Learn how to dash when you will be asked. Even though it allows you to go quicker, do not count on running into the sprint for the job: it’s really not a good strategy in Battlefield 3! Follow the team. Further, you post the exact spot indicated by Matkovic otherwise not advance the game scripts.
Kill the rivals holding behind the car you put away next to a pillar, for example. As for those who do not seek and does not even begin to cover, do not pity! Stand against the wall and aim (right and left) the two men armed with rocket launchers with the sniper. They will be your primary target. Other enemies appear in waves. You can enjoy them knock before they take cover.Once you finish this task, go back and join your squad in the garage. Do not miss the ammo box that will help you to recharge bullets in both grenades. Run towards your friends in the room where you can snipe you hasten to seek the door in front to catch the 3 enemies that enter these places . Once on the roof, a sniper will be problem for you.
Defend allies on the ground by killing enemies on the roofs; first do this on the left and than right afterwards. Cover-up yourself up at the back of the walls and be crouching course. Your friends will be more effective with the threat on the ground. Your priority is really to shoot targets on the roof. Then you will see many terrorists landed in the streets. Do not worry about it but follow the rest of the team behind you. In the next building, do not miss the box of ammunition. Enjoy filling the tank to throw a grenade into the crowd, down the hall at right angles to your current location. Beware of enemies that appear at the bottom when you go. After the long dialogue, enter the cave behind you. Follow the only road available through a conduit to reach the device off. Get out.
Chapter 3: Uprising:
Now crouch along the wall to the right, show the way to a rusty, Crawl to get inside. After a fight against one of the most epic rat, reach the opposed building. Move crouched to surprise the guard and steal his weapon that you will return immediately against the two men in front. Attention, others occur only after eliminating the first, so stay under cover. Same for the next few time. Use the smallest angle to eliminate them without getting hit. Go ahead and kill the enemies posted up on the street as they still do not pay attention to you. Do you then cover and annihilate the last in the face. Fill in the box of ammunition a little further.
This done, repeat the shoot without waiting for the enemy who opened the garage door. Another enemy is waiting for you in the street. Enter the orange bus to continue. Without leaving the vehicle in lint, remove the three enemies that you snipe at the other side. Aim the light of their weapon if you have trouble spotting them.
Chapter 4: Chase:
Follow the instructions on the edge of the fighter. Nothing to report except when checking components, please turn frankly head the figure reached almost 180 degrees of rotation! Your weapons consist of a machine gun to hit the enemy aircraft to short distance. You have homing missiles to lock the enemy in the distance (in front only) as well as measures that act against-commme decoys against the enemy rockets. So, use the-measures against when your aircraft is locked and cons- with a rocket attack after the enemy has used against his own actions, otherwise it will not help. Follows two phases of “shoot” on ground targets. The goal is to talk to the viewfinder on the requested target (in red at first, then white when you turn on night vision) for the bombers succeed their rebellion.
Chapter 5: Operation Guillotine:
Down the hill, gun in the hand. You do not risk anything at this stage. Drop it in the space provided then go to the wall with your colleague. Remove a few men on the other side of the river, facing you, and then follow the squad. Crouch to avoid getting hit by gunfire from fusing the building in the distance. Kill the three men on the ground and take the stairs. We must now destroy two machine gun nests. You can snipe the first but know that what counts is the grenade to a teammate, then a script . It is therefore to hold out a few seconds. Well, it’s the same for the second! So let the team do as there is no choice. This will prevent you from taking unnecessary risks especially in hard mode.
Plate you screwed to the structure to complete the last men on the ground . Another gun starts spitting prunes in height. You join through the left . Here, the shots are very heavy: advance slowly eliminating the soldiers one to one, while remaining glued to the ground. Be wary of opponents finally posted high in the building . Find the rest of the team at the bottom of the building which explodes the ground floor. As everyone knows, who said confined space said shotgun . Then resume your assault rifle as the inside passage is over. Get in the car and follow your men. Although it is tempting to turn some snipers on top of the bridge, it is not useful for the mission at this stage still follow your teammates sprinting . At the top, remove with a maximum by surprise with your shots on the flanks . Progress on the bridge you stash car in cars because they will still be a handful for you in the way.
The enemies respawn in the bank to infinity; it is absolutely worthless to align. Now you just have to sprint against the wall to which is waiting for your team. A truck will protect your race . Then do not forget Matkovic that tells you the route to follow. Matkovic is nice: it helps you to climb and in return you allow access to a scale height. Follow him and help him to settle a small detail. Stock up on ammo in the box to the left then kill all enemies on the other side of the building, the same level as you and the one above. To move safely, you can crawl away from the white wall. You join the rest of the team below that meets some problems as well. Even if the windows of railings not break, you can take through which make so poor shields.
Start by cutting the son as requested by your teammates. Align the two men in the parking lot and then following that appear soon after taking cover in through the huge pillars. Follow your friends on the lower level, the level B. Eliminate opponents, even through the glass, it does not block balls. After another session in the next car park, follow your allies. A colleague opens the next door, behind which there are a few men to remove the speed of light. Remember to press the indicated key to wearing the mask necessary for your survival. There is a box of ammunition in the room also. Upstairs, you jump on an opponent while committing a QTE without any difficulty as usual. Upstairs at the office, go to the right to bypass the enemy . Do not trust the walls with lilies because they destroy very easily. Walk along the ends instead , safer, and giving you a much wider angle of view of the area.
When you get near the box of ammunition, take the time to spray the room with grenades in front because it is full of enemies . When you get close, aim for the heights directly (right and facing the first floor) not to get stuck . Follow the men and put you exactly where indicated otherwise block the action for an indefinite period . Tread carefully between the boxs to avoid being caught by surprise by the multitude of enemies here. Know that your allies can miss the opponent standing behind you so. It can happen. In any case, go to the left along the wall of the building rather than engulf you in the cheese made by the fragile walls . In the hall of the Exchange, go to the right, and then go straight by covering walls with circular. Again, do not center on pain of not knowing where to turn. In any case, there is already a tier the center, supported by two other people left. Always operate via the right side and you have a clear view of the opponents and secure coming through the doors at the back. Be squatting to protect your beloved head.
Chapter 7: Thunderclap:
The handling of the tank is a bit tricky but you have plenty of time to the introduction of the mission for you to do. To reach certainly the enemy tanks, stop you and expect their movements by pulling a shell on their trajectory. After a waiting time, switch thermo vision to distinguish other enemy aircraft on the ground contact 315 on the compass at the top of the screen . Join the rest of the squad. During the following sequence, position the viewfinder on vehicles marked in white and press Action to launch the offensive.
Once that is done, go along close to your teammates using the turbo. Once in the enemy camp, it will be more efficient to use the machine gun to defeat the infantry and the cannon to destroy vehicles and facilities. Do not forget Thermo vision if you are having trouble locating men the ground. Once the key lines of defense, penetrate the heart of the camp to destroy the batteries of rockets indicated by red diamonds. A single cannon shot is enough to decimate all.
“Fearless” is the direct result of the previous mission Battlefield 3 on a tank. To escape the ambush, it is actually smash through the indicated building! On the other side, make haste to destroy enemy tanks (one left and one right) and then advance to the place indicated. The rest of the mission takes place in the turret of the tank. It is necessary to repel the attacks against the enemy helicopter to the left you need to protect. The waves of enemies appear on both sides of the shore. After the helicopter left, you will have beautiful water the opponents, your bullets will pass through. Leave it to the script to complete the mission.
Chapter 9: Team Night:
Using the sniper, shoot all four of the parking lamps. They vacillate greatly but you can hold your breath to avoid shaking your own. With the help of the telescope, follow the light infantry on the ground. Then turn around and abseil to the place indicated. Follow the movements of Campo. An enemy ambush in height slowed you, punch him so his head with the sniper. Do not play the nags but follow the instructions to the letter de Campo. Now that you have reached the roof, shoot the two members of the PLR on the sidewalk right in front of the street.
This done, get walking in the direction of the scale (no particular key) and continue to follow Campo. On the first floor of the building, approach the guard quickly marked in red to make a stealth knife removal . Here, if you arrive too slowly, your character will die suddenly for no apparent reason. After committing this horrible murder , you run away following you-know-who. You go through the sewers. Leaving the through scale, go immediately to the right and get cover behind the concrete debris because the enemies will fire immediately. Start by killing the three on the right and then remove the two last perched high in the middle of the street. Follow Campo to the torture chamber of the PLR. After the dialogue, crouch down and water all the lights coming from the floor in front of you: these are terrorists ! The space is relatively closed, grenades work wonders here.
Join the lifeless body of Al’Bashir Campo and protect bearing man. The safest place is behind the vehicle on the left side of the street perpendicular to where the accident took place . From here you can see very quickly the men coming from the right and left. Follow the path to the hideout of Campo in the mall. You receive claymore mines that do not prove very useful as the first landing of enemies below . Kill them with the sniper rather being squatted near the escalator. Take your time to eliminate all because some are hidden pretty well (behind vehicles, walls). Do not forget the box of ammunition next to the hideout of Campo. As soon as the ground floor is cleaned, new PLR landed on the floor with you, in front and left. Take cover behind the crates with a white cloth and sprinkle over the attackers when they come too close reckless .
This done, Campo will change sides to join the recess in the north of your current location. This does not change much in your case: stay covered here and eliminate the PLR ??coming across with the sniper. Also, many shooters are perched on the first floor . After the sequence of dialogues, another wave of PLR landed in front of you, at the same level. So protect your friend during his run . Yes, friendly fire is prohibited! Remember those you sprinkle on the right when you try to join but there is no requirement to remove them. Outside, wait a few seconds before you jump on the plane and putting you up to cover must Campo is already inside.
Chapter 10:Crossfire:
Proceed cautiously, always cover behind trees and crouching as it is not easy to spot enemies in this area. Help you firing your allies and try to move along the right side for a view as a whole. Follow the squad after reviewing the body indicated by the blue marker. After the dialogue, approach up the enemy camp and while cover behind the rocks, eliminate opponents face . It is best to kill them while they run to hide. You push little by little in their area. The enemy waves come across and the left. Do not go solo but be grouped with the rest of the team while eliminating shooters carefully one by one. As you take as the advantage, they could only deal with you, the left side is totally secure.
Further, the positioning is not difficult because you have only one stone wall to hide you. Kill a maximum of men before the arrival of the tank to blow up the SMAW you will automatically receive . Two rockets are necessary for its destruction. Go ahead, go next to the box of ammunition and eliminate the soldiers in front of you. Still rising in the same way: grouped and crouching behind the rocks . Soon, two other tanks tumble. You defeat them the same way as before. Do not miss the box of ammunition to refuel rockets in particular if you miss your shots . Then follow the trail to avoid Cole Cavour blow by bombing enemy . If you’re full even if only an inch, you’re dead. Take the Stinger to shreds behind the vehicle then do blow up the aircraft flying opponent by ensuring the correct locker.

