
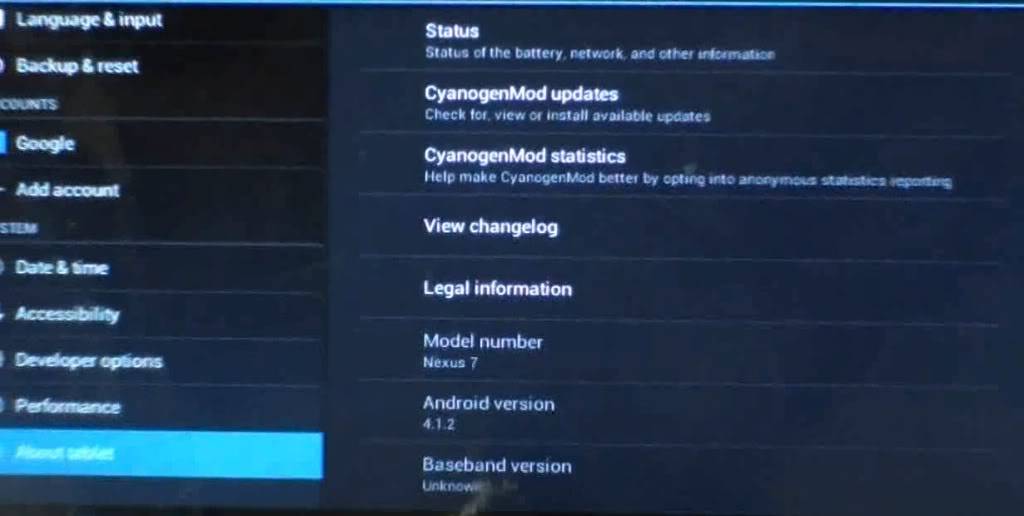
There are many Micromax users waiting for Jelly Bean to hit Funbook but they have never received a single firmware update so far since the release of Funbook. Infact I don’t think it is ever going to get any official update in future also. But thanks to CyanogenMod 10. They have released a stable JellyBean mod and is working good on Funbook.
Earlier we shown you how you can get Ice Cream Sandwich or/and Jelly Bean on Samsung Galaxy Y (which is one more device we can never expect of getting update) and now I will show you how to install Jelly Bean on your Funbook tablet. Lets Start.
Pre-Requirements:
- As usual, before we start the process make sure your tablet has ateast 60 to 70% of battery charged. It should not get shutdown in between the process or your device may get bricked.
- Download the CyanogenMod based Jelly Bean Custom Rom on your PC from here. Copy this file to Tablet’s SD Card’s root directory so that it should be able to navigate.
- Download Google Apps which is to be installed with the ROM from this link. Copy this file to the same directory where you copied above file.
- You must have ClockworkMod Recovery (CWM) installed on your Funbook Tab. To know how to install the same, follow the steps provided here.
- Rooting is also one of the most important requirements but as Funbook comes pre-rooted from the factory itself, you can skip this step.
Installing Jelly Bean Custom ROM on Funbook:
- Turn off Funbook to restart it in ClockworkMod Recovery. Once turned off completely, press and hold “Settings” + “Power key” until you get the Micromax logo on the screen.
- It will boot in the recovery mod. From the recovery screen, first backup your original ROM for safer side. If something goes wrong or you dint liked the new Jelly Bean Custom ROM, you will be able to restore the original firmware.
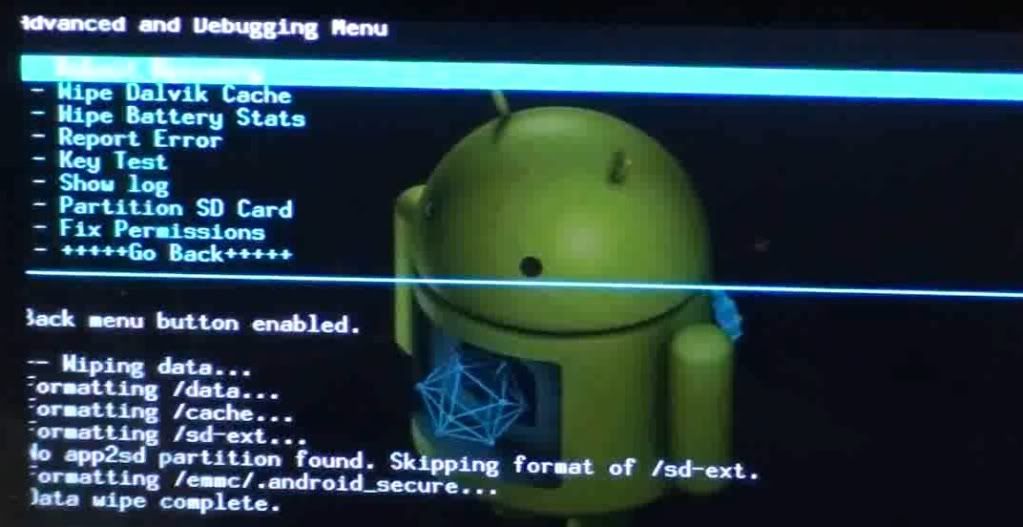
- Once done, use the volume keys to scroll up and down and select “wipe data/factory restore” by pressing Power Key. Confirm with Yes on the next screen

- Now scroll and select “wipe cache partition”. Confirm with Yes on the next screen
- Now select the last option that is “Advanced” and select “Wipe cache partition/Dalvik Cache”. Confirm with Yes on the next screen.
- After doing all these, now we will start installing the Jelly Bean ROM. Go back to main Recovery Screen and select “Install Zip from Sd card”.
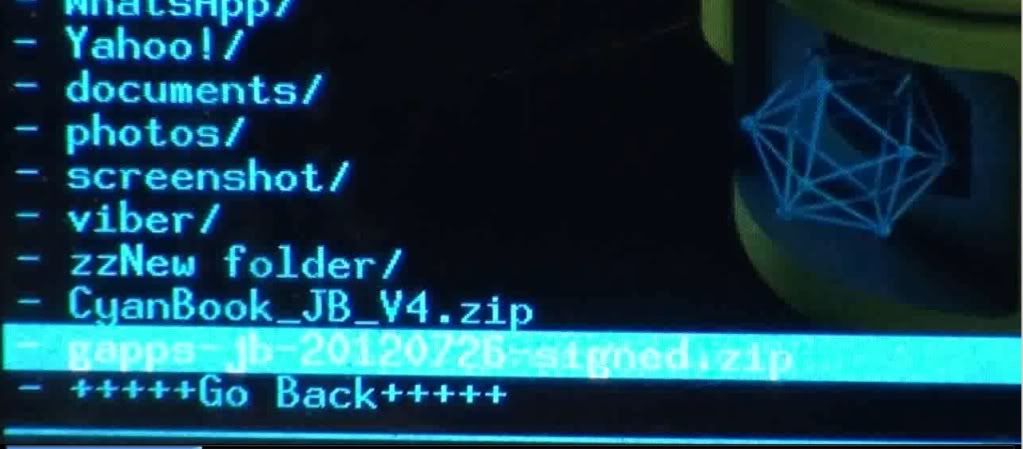
- On the next screen, you will see all your files and folders stored in the SD Card. Scroll and select the “Jelly Bean Zip” file and press Power key. Confirm with Yes on the next screen
- Wait for few minutes and let the mod get installed.
- Once done, now select the “gapps zip” file and press power key to install.
- When you see the installation completed confirmation message, go back to the main recovery screen and select Reboot System Now to boot the Funbook with brand new Jelly Bean interface.
One more thing, when you boot it for the very first time with the new installation it will take time to boot. So keep patient and let it boot properly. If you face any problem or something goes wrong, don’t panic, just restart the process again and re-install the mod again. It will work fine.
To see the complete the guide in action, just watch this video showing installation of this JeallyBean Custom ROM on Funbook:


