
Hello Friends,
Today I’m going to show you step by step procedure of Rooting Micromax Funbook with Custom ROM. To make it much easier for you guys, I’ll also attach a video of installing the ROM so that you wont make any mistake. In this tutorial I have taken “CyanogenMod 9” based Custom ROM named “Cyanbook v0.4”. As its name suggests, it is dedicatedly made for Funbook and hence works 100%. It is based on Android 4.0.4.
With this MOD you get many new features which is not available with Funbook’s default Android 4.0.3 operating system. Such as Bluetooth, built in Dock with Apex launcher, you can change Application Screen background, Lock Screen Background, Volume keys right on your home page notification bar, built-in Screenshot, Voice dialer and many more. Apart from this, after installing this ROM I found very much improvement in the Tablet performance.
So now lets see, how do we install Custom ROM (Cyanbook) on Micromax Funbook. Before we start, there are few requirements that should be done. We need some files to be downloaded before we actually start the process. Here are those:
Pre-Requirements:
First of all make sure that your Funbook has atleast 50% of the battery charged because if the Tab gets shutdown during the process, your tablet may get brick and nobody will be able to fix it. There is nothing to worry so much about this, just keep your battery charged for atleast 50%.
- Download CyanogenMod 9 “CyanBook_v0.4” from here. It is 114MB in size.
- Download Google Default Apps from here. It is 43MB
- Your Tablet must be ROOTED before we can start installing Custom ROM. Here again, you don’t need to worry because all Micromax Funbooks are already Rooted. Yes, they come pre-rooted from the factory itself.
- Last and most important requirement for this process is to have “ClockworkMod (CWM) Recovery” installed on your system.
Installing ClockworkMod (CWM) Recovery on Funbook:
In order to get this Custom ROM installed, all Android based tablets or Smartphones need to have CWM installed on your device. The problem is there is no CWM recovery available for Funbook. Neither on Google Play nor CMW official Website. There are few techies on web who have found their ways to install CWM in Funbook but that requires a huge and long process of about 30 minutes where you need to download various drivers for your computer, installing drivers, connecting Funbook with your PC, downloading few apps from Google Play, then tweaking and installing.
But I found a way where you can install ClockworkMod recovery on Funbook in less than a minute and without downloading/installing drivers. Infact without connecting your tab with computer. Yes, that is correct.
In order to install ClockworkMod on your Funbook, simply download “NovoTools Recovery.zip” from our Download Center. It contains an apk file and a recovery iso. Total file size is just 5.11MB.
- Once download, extract it in your SD card’s root folder. You will get two files named as “Novotools_c1.0.apk” and “recovery.img.” See the image below.
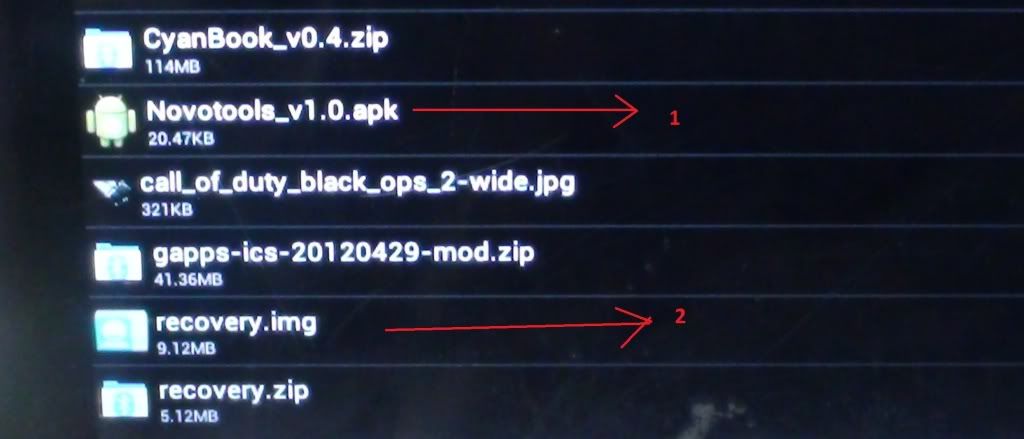
- Now tap Novotools to install.
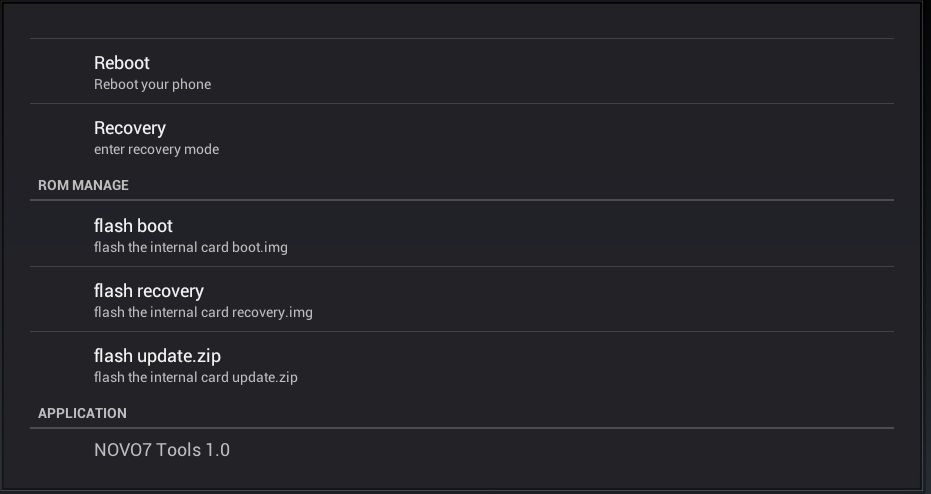
- Once installed, run Novotools. You will see an option called “Flash Recovery.” Tap it (make sure the recovery.img file is in your root as mentioned above). It will take 5 to 7 seconds to flash.
That’s it. You now have CWM recovery installed on your Tablet. Isn’t it so simple? Of course it is.
Installing CyanogenMod 9“CyanBook_v0.4 Custom ROM:
Once done, we are now ready to install the Cyanbook. Just follow the below steps.
- In order to start the installation, copy downloaded files, that is CyanBook_v0.4 and Google Default Apps (gapps.zip) to your Tablets SD card root folder. Don’t unzip them in the root, just copy them in your root folder.
- Now we need to boot the Tablet in recovery mode. You can do this by simply tapping the “Recovery” option in Novotools or by turning off the tablet and booting in with “Settings” + “Power key” press and hold simultaneously until you get the Micromax logo on the screen.
- Once booted in CWM recovery, first backup your original ROM so that you can flash the original firmware again in future if you required.
- After this scroll with Volume button and select “wipe data/factory rest”. Follow selection press power key.
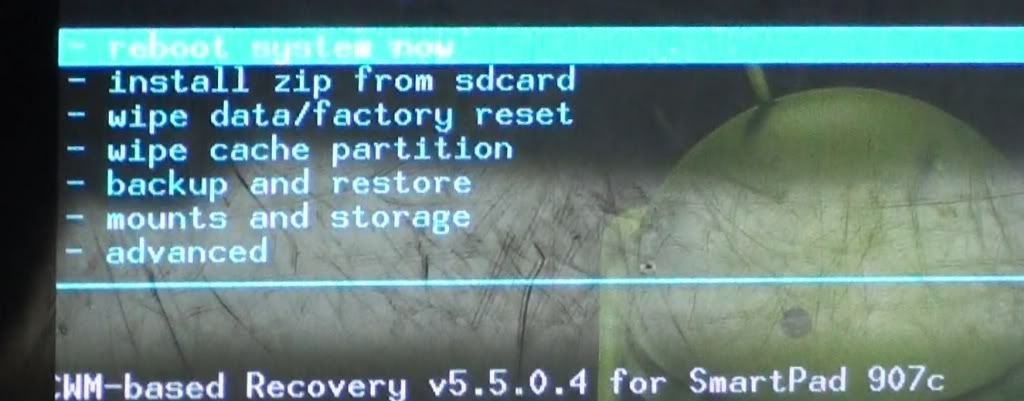
- Now scroll and select “wipe cache partition”, press power key to wipe it out.
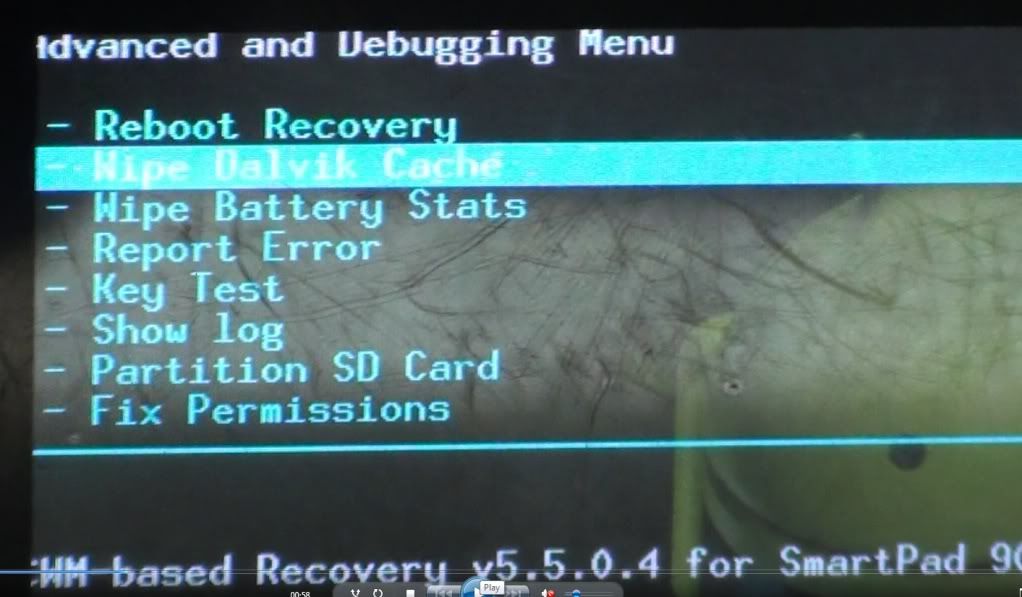
- Now scroll to the bottom and select “advanced” option, and select “Wipe cache partition/Dalvik Cache”. Press power key to confirm.
- Once done, go back to the main recovery screen and select “Install zip from SD Card”, press power key to confirm.
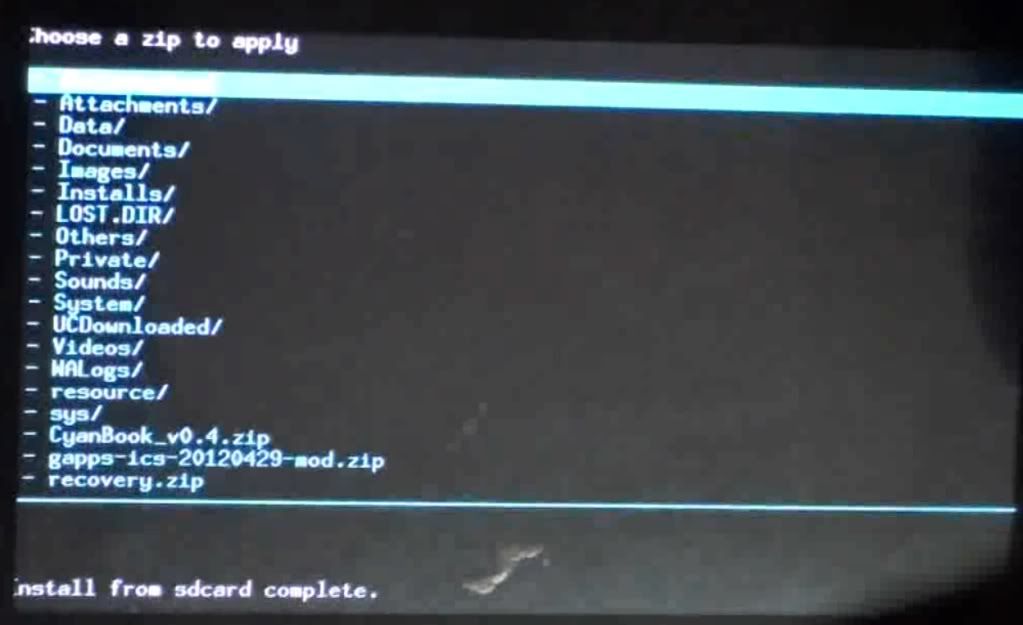
- Select “Choose Zip from Sd card” and confirm again.
- On the next Screen scroll down with volume keys and select “Cyanbook v0.4.zip”, and press power key to confirm. This will take about 2 to 3 minutes to install Cyanbook on your tablet. Once done, you will be redirected automatically to home screen with message saying “Reboot To Experience CyanBook”
- But wait, don’t reboot. We need to install gapps as well. Again choose “Install zip from SD Card” and “Choose Zip from Sd card.” Select “gapps.zip” from the root and confirm.
- Once done, press Back key on your Tablet and select the option “Reboot System Now.”
That’s it. Your system is now with Custom ROM “CyanBook” with lots of new features. On this very first reboot after the installation, it will take few minutes to boot, so don’t get hampered. Wait and let it go. To check the complete features and whats new in this, please check the video attached below.
If you have any questions regarding this, feel free to comment below.
Here is the entire process in action. In this video you can see our guy installing this Cyanbook Custom ROM on his Funbook:


