
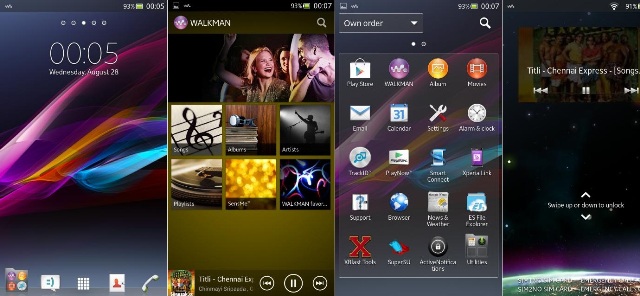
LAVA Iris 504Q is an amazing budget phone in the market. The device runs on quad core cpu and has good graphic chip also. Due to which it is possible to run different custom rom on the same. Today I am going to show you how to install Xperia ROM V2 on the same. This new Xperia ROM is build on Sony Xperia Stock OS them offering you the latest Android Jellybean 4.2.2 update along with several Xperia features such as its launcher, themes, walkman, small apps.etc . It works fine and is super smooth compare to other rom. It adds more tweaks and advance features.
Even after being low on hardware config still LAVA Iris 504Q is capable of giving you stable output. You can get the latest jellybean update with new features associated with gesture control. It gives you a complex set of lock screen, themes, launcher, and other important applications. You will surely enjoy this new rom. You will get all default Sony applications in the same. And it works really nice. So let’s move head with installation of the same.
Pre-Requirement:
- Ensure that your phone has maximum battery left. Do not run any installation if the battery output is low.
- Download Iris Xperia Rom V3 JB 4.2.2
- To install the custom rom you will have to root your Iris 504Q. You can do that through CWM.
- After rooting you must backup your entire phone. Use powerful rom backup software. In case if you don’t like the rom or if it is buggy you can restore the existing OS back again.
- There must be more than 2GB of space left in your memory card.
- Copy all the contacts, photos and videos and keep it somewhere else. The custom rom setup will wipe out everything.
Installing Iris Xperia Rom V3:
- Download the custom rom and keep it on your desktop.
- Copy the ROM in the SD card.
- Turn off your device. Insert the memory card in the phone
- Boot your phone in CWM Recovery mode. You can hold the volume up + power button at the same time to boot in CWM recovery.
- Now turn off your device and go to CMW Recovery mode by pressing volume Up and Power same time to get in to recovery mode.
- From the menu wipe data and select factory reset. Then select wipe partition.
- Again go in the advance menu and then choose Dalvik Cache clear. Look for Battery State Clear.
- Now go in Mount and storage and choose format system.
- At last you have to go in Install from SD card and from there choose the Custom rom which you had copied in the memory.
- Wait back until setup is over. If everything goes well the rom will be installed and you can enjoy the new custom rom on your phone.


