
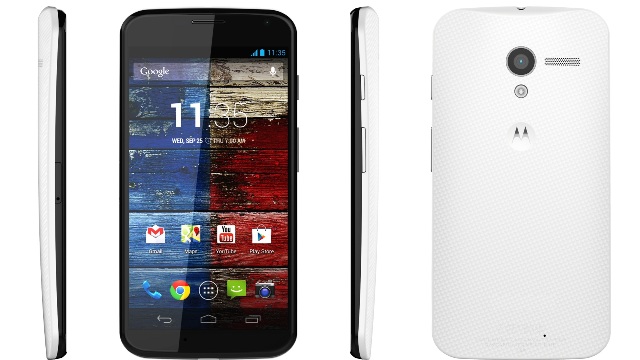
Moto X is amazing device that is in budget plus gives you good hardware config. It is a ultimate choice for those who need a phone for multimedia and for gaming. But it happens that you have rooted the pone for installing custom rom. After rooting you are not satisfied and want the old phone Os back again. So in this guide I am going to give you that process.
By which you can simply get the stock rom back again quiet easily. It is fast and effective process. After rooting you also lose your phone warranty. Through my process you can get back the stock rom back which is the original factory operating system. For restoring the stock rom you have to use two methods. The first one is the RSD lite method where you have to RSD LITE tool. It is essential that this tool must identify your device. And the second method is a bit complicated but effective. It is called as manual flash. We are going to flash everything manually. If RSD Lite does not work then try the manual flash but carefully.
Requirements:
There are few things you have to try before going ahead with installing stock rom. This are precautionary things so just checkout the list below.
- You will need a windows based pc here.
- You have to download and install the latest Android SDK on your pc.
- Update your system with the latest moto x drivers. You can find the same here or you can install Motorola Device Manager to get proper drivers.
- Download RSD Lite. This will be used for the first method.
- Download the Stock firmware for Moto X from here depending upon your carrier and region.
- Download Moto Fastboot file. This will be used for manual flash.
RSD Lite Method:
- Install RSD Lite on your system. You have to install the most latest version do not go with old one. It might be not stable.
- Just check that you had install the latest usb drivers on your system. You have to re-verify this. You can do that by installing Motorola Device Manager.
- Extract the content of firmware file on a desktop in a folder. You have to find the right firmware version here based on your phone model and region.
- After extracting you will find a file VZW_XT1060_4.2.2-13.9.0Q2.X-116-MX-17-53_CFC_1FF in it. It is a xml file, just right click on that and choose open with notepad.
- Find <step operation=”getvar” var=”max-download-size” /> and then delete it. Save the file. If you want you can create a backup of this file.
- Enable usb debugging on your pone and connect it to your pc through usb cable.
- In the same folder where the file is extracted hold shift + right click and open cmd. Type adb reboot bootloader. Phone will boot in fast boot.
- Run RSD Lite. Verify the connection status. Then click on browse and choose the xml file. Click on open and flash.
Flashing Moto X Manually:
1. Now this is a easy but a bit risky process. It is for those who are not able to use RSD Lite. We are going to use mfastboot here. You have to type a few set of command listed below.
2. Connect your phone to your pc through micro usb and ensure that usb debugging is on. Without proper drivers the phone will not be detected.
3. Go in the folder where the firmware is extracted. Hold Shift + right click and launch cmd.
- Then type fastboot oem fb_mode_set and hit enter.
- Then type fastboot flash partition gpt.bin and hit enter.
- Then type fastboot flash motoboot motoboot.img and hit enter
- Then type fastboot flash logo logo.bin and hit enter
- Then type fastboot flash boot boot.img and hit enter
- Then type fastboot flash recovery recovery.img and hit enter. Type the name of recovery image.
- Then type mfastboot flash system system.img and hit enter
- Then type fastboot flash modem NON-HLOS.bin and hit enter
- Then type fastboot erase modemst1 and hit enter
- Then type fastboot erase modemst2 and hit enter
- Then type fastboot flash fsg fsg.mbn and hit enter
- Then type fastboot erase cache and hit enter
- Then type fastboot erase userdata and hit enter
- Then type fastboot erase customize and hit enter
- Then type fastboot erase clogo and hit enter
- Then type fastboot oem config carrier vzw and hit enter
- Then type fastboot oem fb_mode_clear and hit enter


