
Ubuntu Dual Boot Installer is helpful to developers who want use and run both Ubuntu and Android on a single device. The developers who are installing it should be familiar with the Ubuntu and Android using and they should also be able to detect the flaws manually. This boot is not a regular part of the release but it was an internal work which was further decided to be reviewed for testing and studying for the developer’s community. The various things that one can expect from the dual boot installer are as follow:-
- Only one device is used to control the functioning of both android and Ubuntu.
- In the android version, an Ubuntu Installer app is used to install Ubuntu.
- The Super User application is used to grant permissions to the Ubuntu Installer app
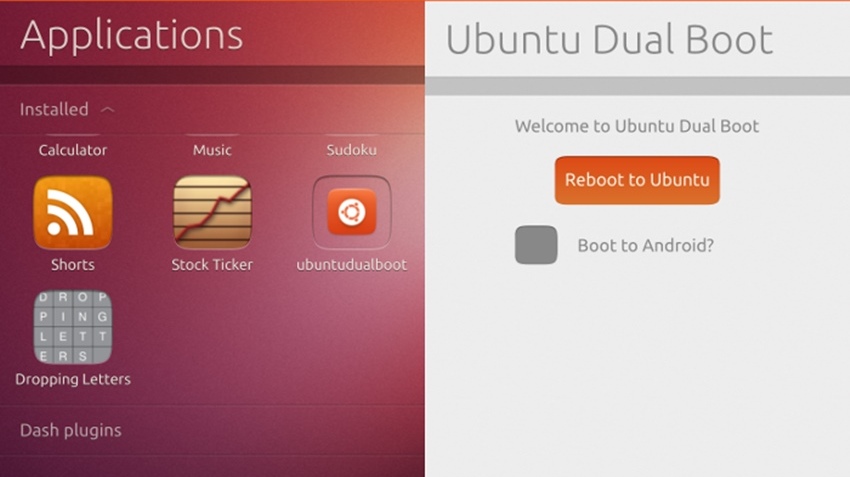
- In the Ubuntu version, an Ubuntu Dual Boot app is used to boot into Android
- At present, the Ubuntu updates can be done only from the android version and not the Ubuntu version.
 Now as you know every development stuffs comes with some pre-requirements, dualbooting Android and Ubuntu also has some for itself. Here are the requirements for installing the dual boot installer:
- A device running on android 4.2 or the higher version. The installer has been tested on Google Nexus 4
- The ADB tools shall be running on your personal computer and a free storage of around 2.7 GB is required in the device in which it is going to be installed.
- Also you need to enable the USB debugging.
Now lets start with the actual Dual Booting Process. Make sure you follow all these steps carefully and properly
Step 1:
- Firstly you need to set up the touch developer preview tools PPA by adding the custom source list entry to your etc/apt/sources.list file and press Ctrl+Alt+T for starting a terminal. Now write the following in it:
sudo add-apt-repository ppa:phablet-team/tools
sudo apt-get update
sudo apt-get install phablet-tools android-tools-adb android-tools-fastboot
- Then you need to create your android back up that is optional:
- If it is not enabled, then enable developer mode, by going into Settings – About phone – Build number
- If it is again not enabled, enable the USB debugging by going into Settings – Developer options – USB debugging
- Now you need to execute on computer $ adb backup -apk -shared -all
- This shall create backup.ab with all of your data. Later, after android rooting or unlocking you will be able to use $ adb restore backup.ab to restore all of your data.
Step 2:
Remember these step is to unlock your device. Follow only if your device is locked. You need not do these things if your device is already unlocked. These steps will delete all your phone data.
- Turn on the device powered off
- The device will now boot itself into the boot loader.
- Now connect your device with your computer
- Now press Ctrl+Alt+T to start a terminal. Type sudo fastboot oem unlock and press Enter
- The device will now accept the terms of unlocking it
- Now after doing this much. Boot your device.
Step 3:
Now follow these steps carefully for Initial Device Setup. Any mistake done here can create problems.
- Boot your device to android.
- Start USB debugging on the device
- In Ice Cream Sandwich (version 4.0) go to Settings and turn on USB Debugging (Settings – System – Developer options – USB debugging).
- In Jelly Bean (versions 4.1 and 4.2) you go to Settings, About Phone and tap the Build number 7 times to view the options of the developer.
- On Android version you must then enable USB debugging via Settings – Developer options – USB debugging. You will also need to accept a host key on the device.
- On the workstation – adb kill-server; adb start-server
- Now connect your device to the computer.
- A pop up key will show the host key based on the android version which it is installed.
- ‘adb devices’ should not show the device as ‘offline’. If it shows offline then unplug your device and then run adb under sudo on the workstation (sudo adb kill-server; sudo adb start-server), then again connect the device.
- In some cases, the device will show offline, and the host key will not appear. This will happen if the USB connection method is ‘MTP’ (default). Uncheck all options in the USB connection method (Settings – Storage – Menu – USB computer connection – MTP, PTP). This will surely solve the issue.
- Now save this version on your device and if you want the version you can find it in by going to Settings – About Phone – Build Number.
Step 4:
Now follow these simple process to install the Ubuntu Installer app in Android smartphone.
- Download the dual boot installation script on your computer from: http://humpolec.ubuntu.com/latest/dualboot.sh
- Now press the Ctrl+Alt+T key to open the terminal
- By typing this command, it will make the installation script executable.
chmod +x dualboot.sh
- You need to now ensure three major things that your device:
- has booted normally to Android UI
- has USB debugging enabled
- has an unlocked boot loader
- Connect your device to your computer
- Install the dual-boot by running one of the commands on a terminal:
- If it’s the first-time dual-boot installation and you are using stock Android or AOSP firmware without the SuperUser app, run this command:
./dualboot.sh FULL
- To update the Ubuntu Installer App or if you are running non-stock Android firmware (e.g. CyanogenMod), run this command:
./dualboot.sh UPDATE
- If it’s the first-time dual-boot installation and you are using stock Android or AOSP firmware without the SuperUser app, run this command:
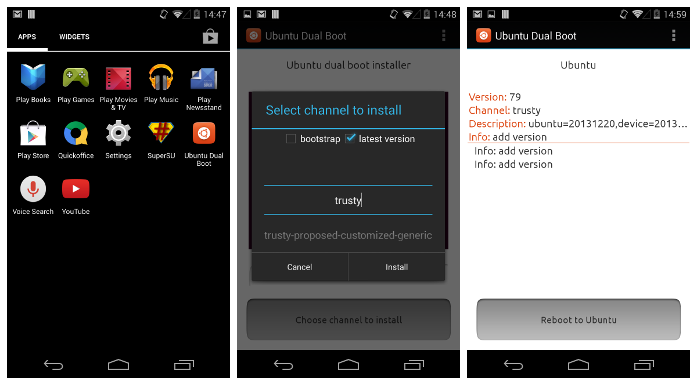
After installation is completed then the phone will reboot itself for several times. After this is completed it will boot to Android and you will find the dual boot app as “Ubuntu Installer” in the Apps section.
Now if you want to install Ubuntu from the android then you need to follow the following steps:
- The main thing you need to see that a minimum space of 2.7 GB is available free on the device
- To clear the space while the device is connected to the computer, type the following command on the terminal “adb shell “su sh rm -rf /cache/*”
- Now run the Ubuntu installer application
- Now choose a channel from which it has to be installed
- After downloading is finished you need to click the Grant button to grant SU permissions
- Now click on reboot to Ubuntu to boot back to Ubuntu
Here are few things you need to know about all these steps and process. The phablet flash tool and the Ubuntu installer support common channels. When you select the Ubuntu channel you need to uncheck the latest version option or it will default to the latest image. If the installation of the Ubuntu download is completed while the phone is locked the installation button will show resume install and you have to resume it to complete the process. The bootstrap checkbox that appears when you select the Ubuntu channel helps you to clear the user data.
Here is one more very important stuff. To download the newer version of the Ubuntu you need to delete your older version of the Ubuntu as dual boot is a different method of update. If you click the delete user data button while uninstalling the older Ubuntu version then all your contacts, installed applications, photos, etc will be deleted. After uninstalling the older Ubuntu version you can follow the same steps for installing the newer version of Ubuntu.


