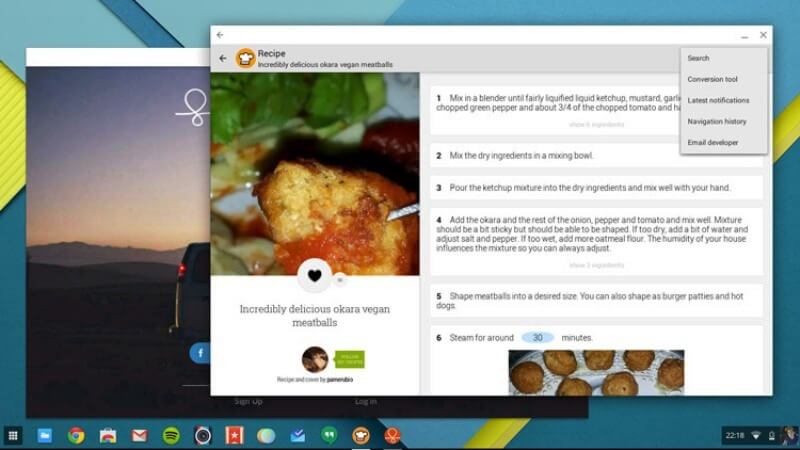
Chromebooks has been a huge success in the education field. With its immense success, google is bringing more adoptive features to Chromebooks. And one step towards this, is introducing Android apps support on Chromebooks. Earlier Chromebook doesn’t used to support the android apps which has become a slightly negative point about these laptops.
As we all know Chromebooks are running on Chrome OS, it supports webapps, chromeapps and now it also supports the Android apps. If your chromebook is made in 2017 or after that then you will have Google Play Store installed on it. You can find your favorite apps and easily install it without any issue. In fact, Google has released a list containing the name of apps that could be run on Chromebooks. Google has launched the android support on device to device basis.
So, if you are not in the list then worry not, we will provide you the guide on “How to get android apps on your chromebook?”
- Make sure that your chrome OS runs on Chrome OS version 53 or later.
- Go to setting cog and then select ‘about chrome OS’ at the top of the screen. You can alternatively find the version from the status area also.
- Check for the update, if there is any update available. You can refer to that by going to the about section where check for update.
- Download the update and install the update and after that reboot you PC and test back.
- Once your installation is complete then visit the status area and find the option setting cog.
- You have to enable the google play store option there to get the android apps in your chromebook and you can do that by clicking the checkbox ‘Enable Google Play Store on your chromebooks’.
- Agree to terms and condition and then finally you will be able to run apps store.
If everything is working fine then you can download your apps and enjoy. And if your system is not supporting Android apps, then proceed further.
In this step, what you need to do is change your chromeOS to Chrome OS developer channel. This step includes some of the risk as you might encounter some bugs, maybe of the things become unstable and the result can be a bit clumsy. And in order to return to original state you might have to perform “Factory Reset”.
Note: Please take backup of your entire data so that in case of any emergency you can push the data back to the system.
Changing to Chrome OS Developer Channel:
This might be a risky process, but it is quite easy to work on.
- You have to open the setting page which can be find in the setting cog option in the lower left corner.
- In the about section you have to find the version number and the channel of Chromebook.
- There you will find a button of more info which will provide you the complete detail of the Chromebook.
- Click on change channel. This will let you change and choose the column you wish to have for your Chromebook.
- There are two channels available – Beta and developer (unstable)
- Read the warning prior to that and make sure you are ready to do the changes.
- If you are sure to perform the changes then click the change channel button.
- once you will choose the step, the chrome OS will get installed in developer mode after reboot.
- You can download the see the Google app store in beta mode in your chrome OS.
- Login to the account using your credentials which you were earlier using on your Chromebook. If you want to login to the PlayStore account, then follow the steps given below.
- Downloading the app will require steps similar to android devices.
You will see that he looks and feel of PlayStore on Chromebook will be as that of android tablet. If the developer channel is enabled, then the user interface of android apps will look similar to that of android tablet.
Guide to install the app:
- Click and open the Google Play store.
- Locate the app you want to install and then choose the option install.
- You will receive the prompt in the middle of installation to agree for the terms and condition in the application.
- Just accept it and once the app is fully installed you can open it using the application icon.
You can in fact manage the various apps just like you do in your android device. Same keys and same directions will help you here. And there is one interesting thing here called instant app where you can just test and run the application before actually downloading it. You can check the look and feel of the application and if you liked it then you can further install it.
Also, there are some extra tips for you guys to know about the android application:
When you are trying to sync the data of your android application, it will sync with the account you have logged into your Chromebook. However, this is not the case if you are using non-chrome devices.
You can also adjust the data permissions for the app also. Chromebooks provide extra security to your data by giving you the option to only allow the data you wish to have for your Chromebooks. You can do so by choosing the option ‘Manage Android preferences’ in your google play store.
Sometimes the installation of chrome store or some android app is blocked due to insufficient privileges. Make sure you have admin privileged or contact with your admin if you are facing any such issue.
Furthermore, there is no need to mention this but then also. The quality of your Chromebook depends upon the version you have and also on the configuration you are having. Chromebook with accelerometer will make gaming more enjoyable. So, make sure you are fully updated.
Lastly, if you have any query/concern do let us know in the comment section below.


