
Windows 10 offers certain new features and the good thing about it is its user-friendly and things are quite easy to execute. However, if you want to access any particular folder or file on windows 10 or in other words if you want to take ownership of particular file its folder, you need to so some prior setting which is necessary. It’s not like without proper setting you can’t access it. You can but with the proper setting, it will be easier.
Here’s how to take ownership of files and folders in Windows 10:
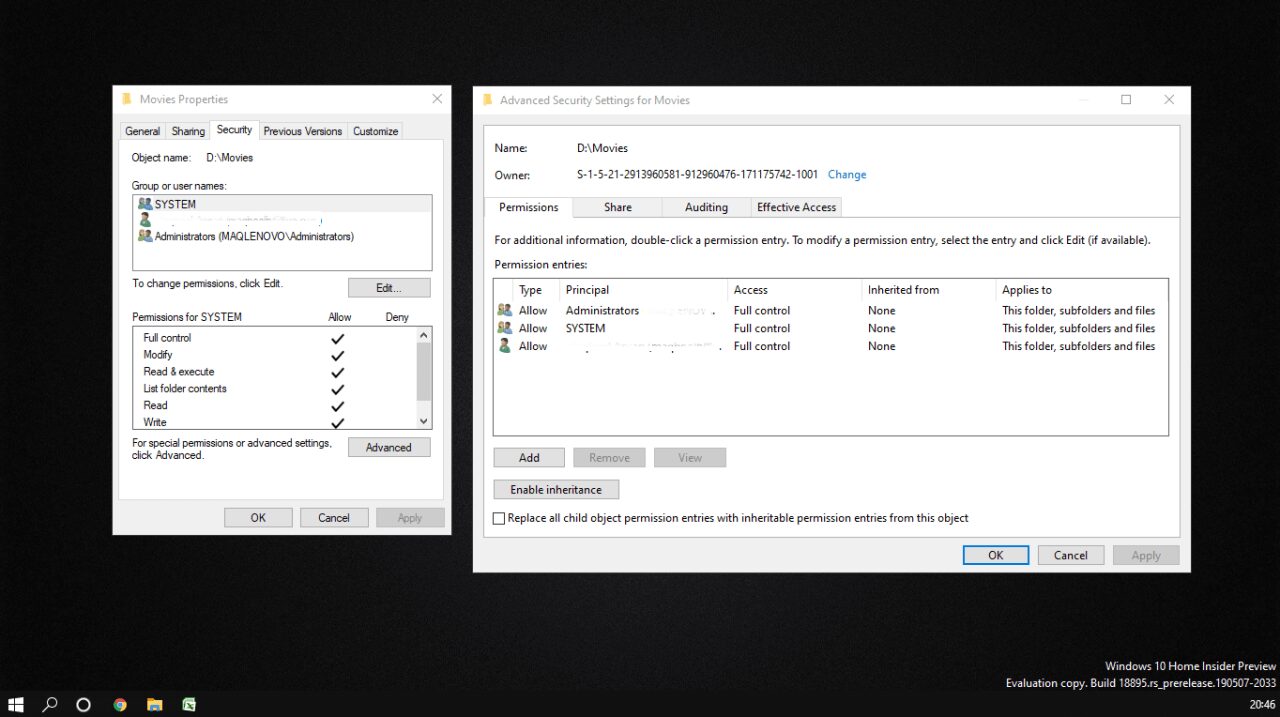
- The folder you want to get access or want to own the very thing to do is right click on it and look over properties
- Now click on Security Tab . Here you will see group or username option where you can look upon the number of a registered user on your PC that can access a particular folder
- After that click on the Advance option. In advance security setting you will see the owner section at the top, there you can the name of the owner
- After that select User or group window will pop up where you can mention the name. before that, you have to mention the object name. By pressing ok you can do it find now options will help you to find all the groups and user name in your computer.
- From the list appearing on the search bar you can select a particular group or user which you want to give access to your folder
- Click OK again
- You can also replace the owner which you don’t want to give access
- Make sure to apply the save changes
If you wish to take full control over any particular folder, there is a guide for that too. For this, you have to make changes in setting options.
- Like earlier go to properties option then further clicking on security than on advanced search
- When advanced search window will pop up, click on add options
- If you observe the select a principal link option click on it
- Like earlier, you will see the same user or group window follow all the steps as before
- The only change you have to make here is in basic permission section you have to give full control by clicking on ok
- Mention the newly added principal and replace the child entries at the bottom
- Apply the save changes
Other than this, third party applications also available in the market. The procedure for that too is shown below:
- The third party application which we are talking about is TakeownershipEx
- Download the application and open it
- After successful installation run the program
- Then it will ask for taking ownership where you have to select the folder which you want to give access to ownership
- An optional feature like restore ownership is also available.
This is the guide for ownership of a particular folder in your laptop or pc. We hope you would have found it useful.


