Welding clamps hold two parts together, especially materials that may be difficult to hold by hand. In other words, welding clamps are like your third pair of hands when welding.
According to Welding Maniac’s guides on welding accessories, welding clamps are must-have accessories. Whether welding at home or in a workshop, it is difficult to complete a project without clamps.
Types of Welding Clamps
Welding clamps come in different materials, shapes, and sizes. The one you choose will depend on the material you intend to use and the size of your project. Popular clamps include:
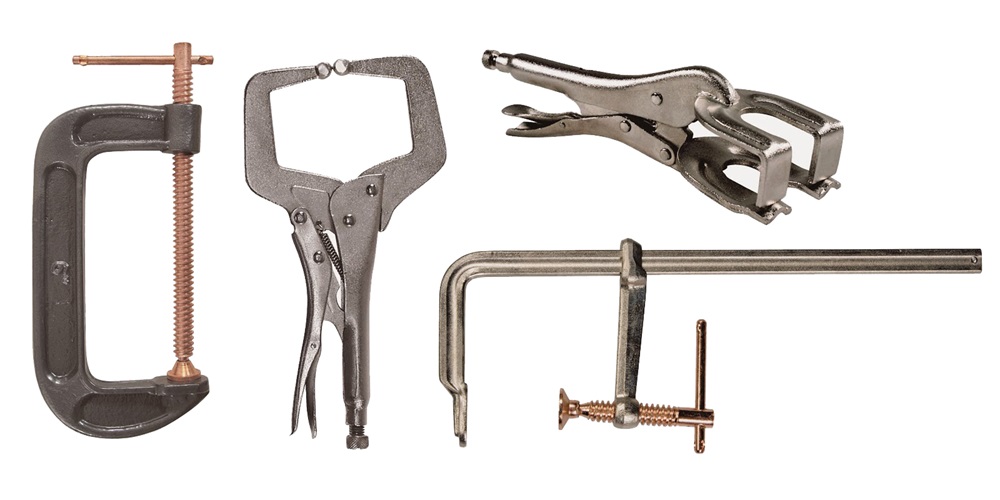
C-Clamp
This clamp is one of the most popular clamps. It is commonly used to hold materials that require a lot of pressure together. Though it holds pieces in place well, the C-clamp may not be the right clamp for use in a project that requires continuous readjustment. This is because it takes a while to release its hold.
Two-Axis Clamp
The two-axis clamp is used to hold two tubes or rodes at a specific angle despite their differences in thickness. The clamp is fixed on a table before use. The most common variation of this clamp is the 90-degree clamp for holding pieces at a right angle.
F-Clamp
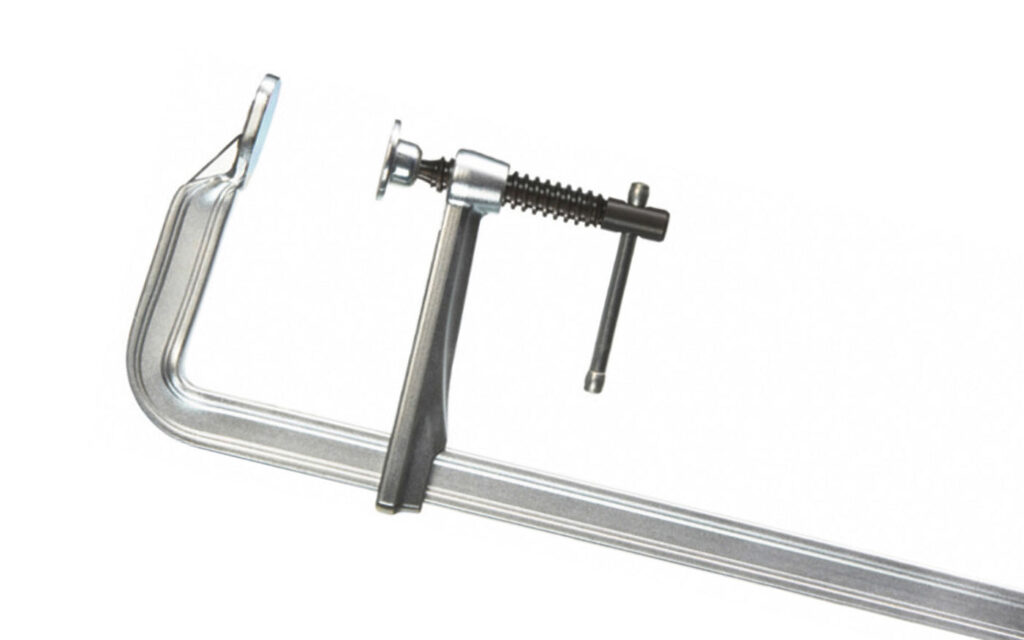
The F-clamp is also known as the sliding bar clamp, and it uses friction to hold the pieces together using the cantilever principle. It is sometimes used in place of the C-clamp due to its wide opening capacity. Another advantage of the F-clamp is that it opens quickly and is, therefore, great for jobs that require quick readjustment.
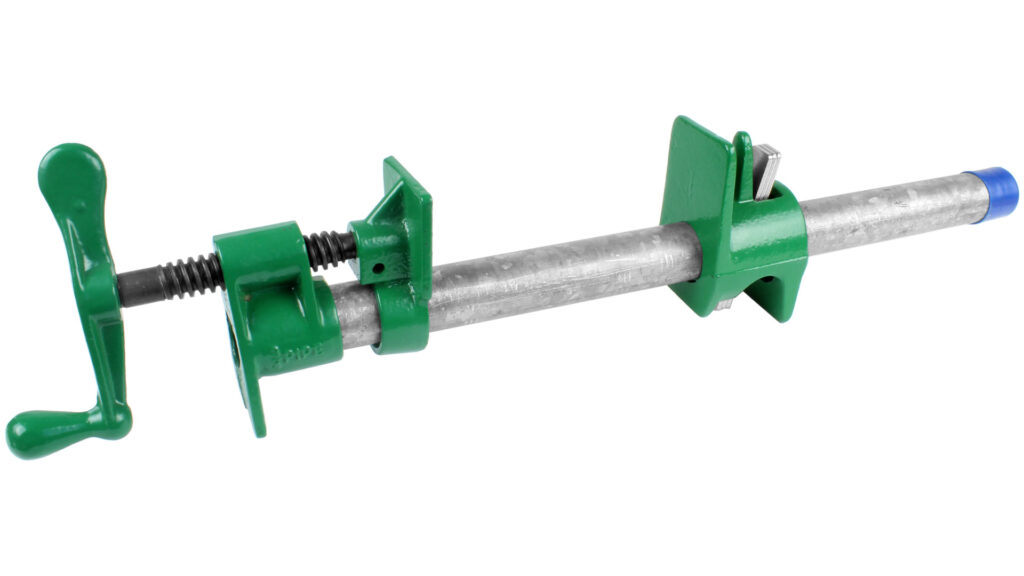
Pipe Clamp
The pipe clamp is similar to the F-clamp in its operations. The only difference between the two is that the pipe clamp uses a pipe instead of a sliding bar.
Spring clamp
The spring clamp is one of the easiest clamps to use because all you have to do is squeeze the handle to open the clamp. It is also quite an affordable clamp. One of the disadvantages of this clamp is its small opening, and that is why it is usually used as an additional clamp.
Quick-Action clamp
As the name suggests, the quick action clamp is the go-to clamp for solo projects that require you to work quickly. They can be tightened using one hand and are therefore becoming more popular.
Dimide Clamp
The dimide clamp is usually used in heavy-duty welding. It has a removable T-handle and a hex head, allowing quick and easy readjustment. It holds pieces in place quite well by squeezing the parts together.
How to choose the correct welding clamps
Having a variety of clamps will help you as you work on different projects. As you grow in your welding experience, you will notice that the number of clamps you use grows as well.
When choosing clamps, lookout for:
- Jaw gap. This refers to the maximum thickness that the clamp can hold.
- Budget. Clamps are usually made up of cast iron or stainless steel. As opposed to cast iron, stainless steel is usually more expensive because it is not prone to rust. Though you can remove rust from metal surfaces, you will probably replace the cast iron clamp sooner than a stainless steel one. Therefore, it makes more sense to spend money upfront picking the stainless steel clamps.
- Padding. Clamps that have padding may cost more but are best for projects that require a cleaner finish or look. The padding prevents any scratches.
How to Use Clamps
Just as with other welding equipment, safety is paramount. Other guidelines when using clamps include:
- Always ensure that you use the right clamp for our project. If your project requires continuous adjustments, a quick-release clamp will work better than a screwed one.
- Do not overtighten your clamps. Though the materials need to be secured properly, overtightening will damage your clamps in the long run but can also damage the material you are using.
- Ensure that your clamps are aligned correctly. Before you start the welding process, ensure that your clamps have held your pieces correctly. Proper alignment gives better results.
- If your weld does not have table support, consider using more than one clamp. This will keep the different sections from moving around.
- Use pads or cushioning. If your clamps are not already cushioned, use a piece of wood or similar material between the clamp and welding material to avoid scuffing and other unwanted marks. Padding will help you create a more finished look on your product.
- Detach your clamps once you’re done. Clamps are a temporary solution in welding and should be removed once you are done using them.
- Clean and oil your clamps. Clean your clamps when they are not being used to remove any leftover particles and oil them lightly, so they are easier to use in the next project.
Most Importantly
If you are a homeowner who has picked up welding and is unsure of what clamps to get, your local hardware store should have someone who can guide you on the right clamps to pick.