Now a days, Mobile Phones have become a very basic need of our day to day lives. From personal to professional, we keep so many important stuffs on our devices, such as contacts, notes, documents, photos, videos, emails, messages, etc. While some are just for fun, most of them are very important. For example some official document that you may need for your career, some emails that may save your job or some cute memories of your life. Like we all preserve the memories of New born baby and keep adding more with their every steps. Similarly Moments with your Parents, Love, and Friends, etc are important too.
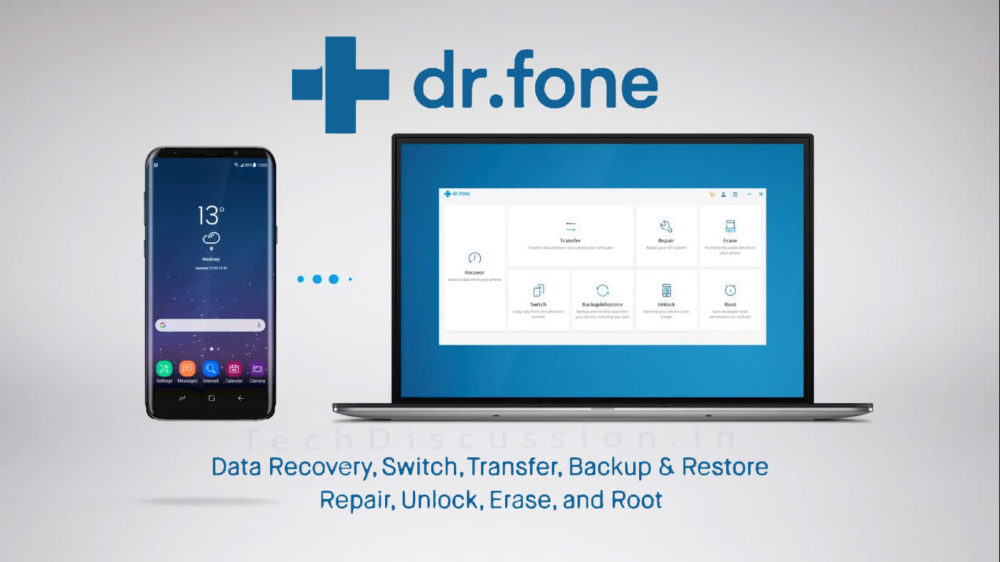
But, what if you loose these moments? Certainly, those moments will never return again. How are you going to recover your deleted photos? Well, the best tool you can use to recover these deleted photos from Android devices is Dr.fone – Recover (Android Data Recovery). It is #1 Ranked Android data recovery tool with loads of features that makes it complete mobile solution. You can check the Detailed Review of Wondershare Dr.Fone here. Not only dr.fone helps you recover photos deleted from Android but also lets you transfer data between devices, lets you Backup & Restore the phone without loosing any data, lets you Switch data from one phone to another, you can Root your phone safely and lots more. Along with Android recovery, it also works with iOS.

Now if you are wondering how you can loose the photos, well, there are several ways of happening the same. Your SD card may get corrupt, the phone may get dead, you or any kid may accidentally delete the photos, etc. There are so many possibilities of loosing the same, and so, you need to Recover those deleted photos if you really want to save your memories. In any of these situations, dr. fone Android photo recovery comes very handy.
Talking about the software, Dr. Fone Android Data Recovery is the first ever tool for Android that lets you recover almost everything from Android smartphones or tablets, including photos, videos, audio, call logs and messages, contacts, documents, as well as WhatsApp messages and attachments. You can recover all or partially as per your preference. The tool supports over 6000 Android devices and has the most success rate of retrieving deleted photos and data from phone memory, SD card or even from a dead or broken phone. Dr. Fone works with Android as well as iOS devices and is available for Windows and MacOS too.

However, in some cases, it is not sure that your deleted photos or data can be recovered 100%. So, since dr. fone Android data recovery is a paid software, you can simply download its Free Trial Version and scan your phone to make sure if deleted photos and data from your Android device can be recovered. And then you can go for the Full Paid version. However, buying Dr. Fone may never be a bad deal because it offers so many important features, or i can say, a complete solution for every Mobile related problems. All it costs is $49.95.
Download for Windows | Download for MacOS | Download Trial
Recovering deleted Photos or Data from any Android mobile or tablet using Dr. Fone is pretty simple. It is just a matter of few clicks. Now, there are 3 different situations to recover your data. First, you can directly connect your phone to recover photo or data from the phone memory of the device, Second is to retrieving data from SD Card and Third is to recover the files from a screen broken or a dead phone. In this article we will show you the detailed guide on how to recover deleted photos on Android.
Recovering Photo or Data from Android:
First of all, lets find out how to recover data or photos from the phone memory.
- First of all Download and install Dr. Fone Android Photo Recovery
- You must charge up your phone atleast above 20% and disable mobile data/wifi because it causes issues in scanning deleted items and overwriting.
- Now launch Dr Fone and click on Recover option (extreme left)
4. After this you will see a new window that says to connect the phone with PC. Make sure you use a properly working USB cable to do the same. But before that, the tool needs root access of your Android device to scan and recover the files. Hence you must enable USB Debugging from the Developer options. If you can’t see Developer Option in your phone’s settings, then follow these options:

It doesn’t matters if your phone or tablet is from another brand and model, Dr. Fone will give you proper steps for doing the same depending on your make model.
5. Once you enable USB Debugging, you will see the connection window, ensuring successful connection of the phone with the software.

6. Once connected, you will see your phone’s name on next window with options to select file types you want to recover from your phone. You can select all, or any particular file type. Click Next when done.
7. Now select to Scan only Deleted files or Scan for all files. I would suggest to only go for the Deleted files because we want to recover the deleted ones only.

8. On next screen, the give you some info about Root access to complete the process. Click Start. Now you don’t need to do anything for few minutes. Let Dr. Fone work on the process.

9. Dr Fone will present you with the scan results of all deleted photos and data (whichever you selected in step 6). In the left pane you can see File Types and how many of those can be recovered, while on the right pane you will see the particular files that can be recovered. Select the ones which you want to recover and click Recover.

10. You will be presented to select a Location on your local hard drive where you want to save all these Recovered photos and data. Later you can move them back to the phone or wherever you want. That’s it.
Recovering Photo or Data from SD Card:
Now since you know how to recover deleted data and photos from Android phone memory, let’s find out how to recover the same from SD cards.
1. Launch Dr Fone and click Recover. Connect your phone using USB Cable.
2. If in case the software is unable to detect the phone, alternatively you can remove the SD card and connect it using Card Reader. I personally prefer using Card reader to skip the phone’s connection process.

3. Once the SD Card is detected with the app, you will see the below screen. Showing your SD card details. Click Next.

4. On the next screen, you will see the option to choose from. Either choose to scan only deleted files or all files to scan. These are Standard mode. Usually this do the work properly, but in case Standard mode fails to scan deleted photos or files, you can use the Advanced Mode at the bottom of the screen. It does deeper scan to retrieve the files. Select the preferred mode and click Next.

5. After the scan is completed, you will see the list of files to be recovered. You can preview every file from Photo, Video, Audio and Documents from the left pane.

6. Select the files you want back, and click Recover button.
7. Choose the location where you want to save the files and Done !
Recovering Photo and Data from Broken Phone:
Third process is to Recover deleted photos or data from dead phone, or from a device whose screen if broken.
1. Launch Dr Fone and select Recover from Broken phone from the left pane.
2. Here also you will be asked for the File Types you want to Recover. You should probably select all since the phone is no more working or alternatively you can select videos or gallery if you want only to recover photos. Click Start.

3. On the next screen, carefully select the situation. Either click on ‘Touch doesn’t work or cannot access the phone’ in case the display is not working or the phone is dead. Or select the second option ‘Blank/Broken screen’ if the Screen is cracked or broken.

4. On the next screen, since the phone is not working, Dr Fone cannot read the phone details. Hence you will have to manually enter the Make and Model of your phone. Click Next.

5. It will ask you again about the Make and Model to confirm because if you entered wrong model number, the phone may get bricked.

6. Now, to connect the phone with Dr Fone, you must put the phone in Download Mode. Usually steps are similar for all phone for doing the same, but Dr Fone will let you know the steps on the screen. Once in Download Mode, connect the phone with computer using USB Cable.

7. On successful connection, the app will start scanning for the deleted photos and data on your Android device. It will Scan everything from the phone including photos, videos, audio, documents, contacts, logs, messages, etc.

8. Once the scan is completed, you can preview the files from left pane. Select all or chose what you want, and then click on Recover button on the bottom right.

9. Choose location to save the retrieved files on your PC. Done !
We just saw how effective Dr Fone is when it comes to Photo or Data Recovery from Android smartphones and tablets. If you have any of such situation and want back your lost files, go ahead and download it right away. Dr Fone is a software from Wondershare who has been offering Mobile solutions since 2003 and is now trusted by millions of users around the world. If you have any query about using this tool or about recovering your deleted files, feel free to use the comments box below.