
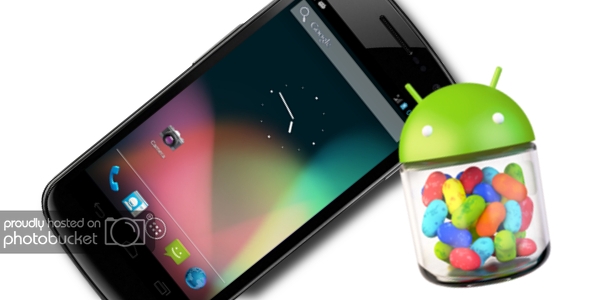
In this article will show you how to root Galaxy Nexus I9250 smartphone. We’re going to use jellybean 4.2 firmware. Before that I want to warn you that if any mistake appeared your phone will be dead. So it is necessary that the mobile phone must be fully charged and under no condition it must be disconnected with the PC. There are certain requirements before rooting the smartphone. Also you will lose the warranty because we’re going to install custom ROM. Due to the availability of jellybean 4.2 custom ROM it is possible to install or update this new android operating system in Galaxy Nexus I9250.
I had tested these only on the said model but there are chances that this custom ROM can work on other devices also. So it is just on your own risk whatever changes you’re doing. So let’s begin with the routing process. Google has released the source code of jellybean 4.2. But the update is not provided on all smartphones. With the help of custom ROM we will be able to install jellybean on different devices. Let’s check out the requirement for performing this routing process.
Requirements:
- You will need the unlocked version of Nexus I9250. Unlocked version means it must not have s locked ROM.
- Rooting will void the warranty mobile phone. But it is possible to reclaim that by installing the official firmware back again.
- Custom ROM of jellybean 4.2.
- A good backup and restore application. Backup and restore application will help you to get back your contacts and messages along with some installed application. You can try titanium backup. You can copy all images, videos and photos to the memory card.
- If you are on a 3G or 2G network then note down all the settings of APN and MMS.
- Enable USB debugging mode. You can find that under settings > application > development > USB debugging. It is necessary to enable it or else Mobile can brick.
- Download Galaxy Nexus jellybean 4.2 ROM – http://www.mediafire.com/?gxwrgw1dwa96887
- Download superuser zip software. — http://www.mediafire.com/?s0vvjuo40e6ag3j
Now when you’re done with all the above process we will go with the routing process. I am going to mention each and every step in detail way. It is necessary that you can take a printout or keep the guide open on your screen and refer them completely before rooting. So that nothing can be missed. Adding custom ROM in Galaxy Nexus will help you to unlock many new features and install various applications.
1. I had mentioned to download two things under the requirement section. The first is Galaxy Nexus jellybean ROM and the second one is superuser zip. When you have done with the download extract them separately in your system. Keep it somewhere you can access them using.
2. Connect your Galaxy Nexus I9250 the PC via USB cable. Enable debugging by going inside settings > application > development > USB debugging.
3. You will have to walk in Galaxy Nexus jellybean 4.2 rom and superuser zip file in the smartphone.
4. Run command prompt in your Windows and run command adb devices. The commands are ADB devices and ADB reboot recovery.
5. Now disconnect them while from your PC and turn it off. You have turn on the mobile in recovery mode. For that press volume up + volume down + power button.
6. The device will now start on boot screen. This is the recovery mode of Galaxy Nexus.
7. You will have two navigate to option called as ‘install zip from SD Card’. Now in the folder where you had, the new update select clockwork mode recovery. And then once the process is over select superuser package file. It is necessary that you must copy everything.
8. After selecting each of the file it will take around 4 to 5 minutes to apply them properly. If you’re mobile ROM is locked then you will not be able to apply these new updates.
9. Now once when and the process is over you can go in settings > about and check out whether jellybean version is updated or not. Or you can also download Root checker software which will tell you whether you’re mobile rooted or not.
10. If after applying the patches the mobile does not start remove the battery wait for some time and reinsert it back.


